The 70Mai Dash Cam Lite is designed for straightforward daily driving recording. This guide covers mounting, recording controls, storage, WDR, loop recording, parking surveillance, and the optional GPS mount using details provided for the Dash Cam Lite.
[reference] Title: Video Recording Text: Records at 1920x1080 resolution at 30 frames per second and saves recordings as MP4 files. Title: Camera Text: Uses a Sony IMX307 sensor with a 130-degree field of view and an f/2.0 lens. Title: Storage Text: Requires a Class 10 microSD card and supports cards up to 64GB. Title: Built-In Audio Text: Includes a microphone and speaker. Title: Internal Battery Text: Includes a 500 mAh Li-Ion battery that is charged through the vehicle power connection. [/reference]Mounting the Dash Cam
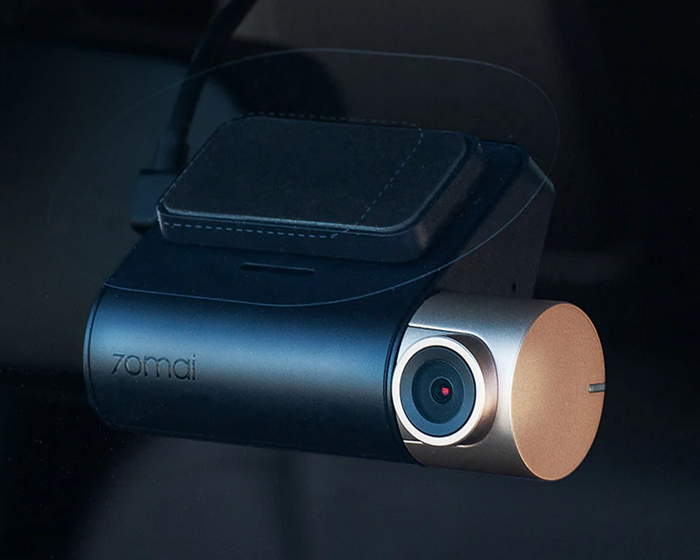
The compact camera can be positioned high on the windshield, such as behind the rear-view mirror, to reduce obstruction while keeping the road in view.
An anti-electrostatic windshield sticker is included as a mounting surface. The standard mount or optional GPS mount can attach to this sticker.
[checklist] * Choose a windshield position with a clear forward view * Fit the anti-electrostatic sticker before attaching the mount * Insert a compatible Class 10 microSD card * Connect the supplied power cable * Route the cable so it does not interfere with normal driving controls or visibility [/checklist]Storage and First Setup
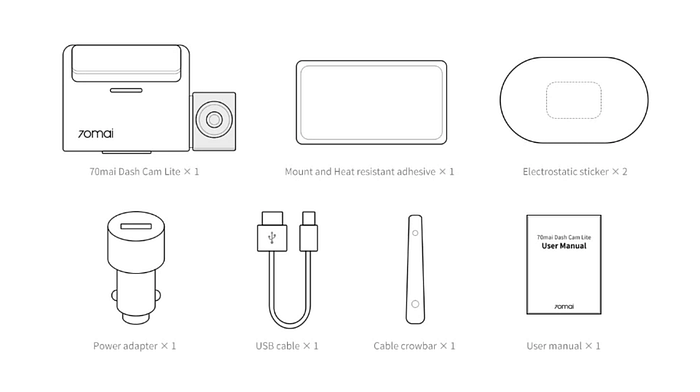
A microSD card is required for recording and was not included with the reviewed unit. The Dash Cam Lite supports Class 10 microSD cards up to 64GB.
[step] 1. Insert the microSD card before normal recording 2. Connect the Dash Cam Lite to vehicle power with the supplied micro USB to USB-A cable 3. Format the microSD card when the camera requests it 4. Turn on the Dash Cam Lite Wi-Fi when connecting it to a phone 5. Open the 70mai app and complete the required account and camera connection steps 6. Confirm that recording has started before driving [/step] [note] Setup screens and available options may vary with the app version, accessory configuration, or market. [/note]Screen and Physical Controls
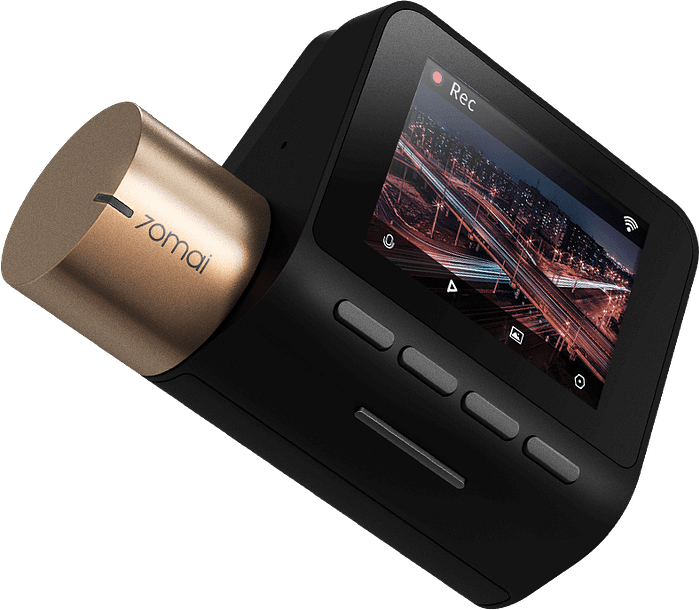
The Dash Cam Lite has a rear LCD screen for viewing the camera image and navigating settings. Four buttons beside the screen are used to move through menus and select options, while the button on the bottom is the power button.
[reference] Title: Rear LCD Text: Shows the camera view and device menus. Title: Four Menu Buttons Text: Used to navigate and select settings shown on the screen. Title: Bottom Button Text: Used as the power button. Title: Green Status Light Text: The reviewed unit displayed a green light while recording. [/reference]WDR and Everyday Recording
WDR can be enabled to improve visible detail across bright and dark parts of a scene. In everyday use, it acts as a wider dynamic-range recording option for situations where shadows and highlights appear together.
[tip] Check the camera view and recording indicator before starting a trip, especially after changing the memory card or camera settings. [/tip]Field of View and Video Quality
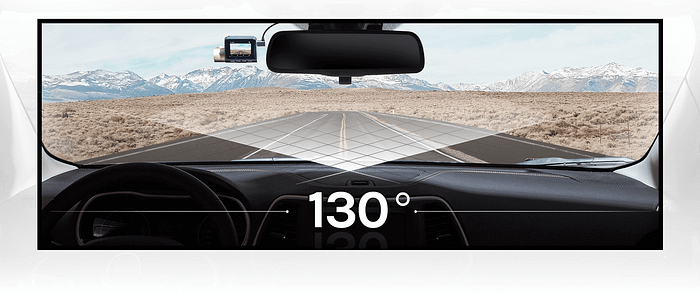
The Sony IMX307 sensor provides a 130-degree field of view. Video is recorded at 1920x1080 and 30 fps, while the f/2.0 lens is intended to support recording in lower-light conditions.
Daylight recordings can provide enough detail to distinguish nearby vehicle types and colors. Small details such as license plate characters or faces may not remain clearly readable in every recording, so recorded video should not be expected to capture fine identification details under all conditions.
Power and GPS Mount
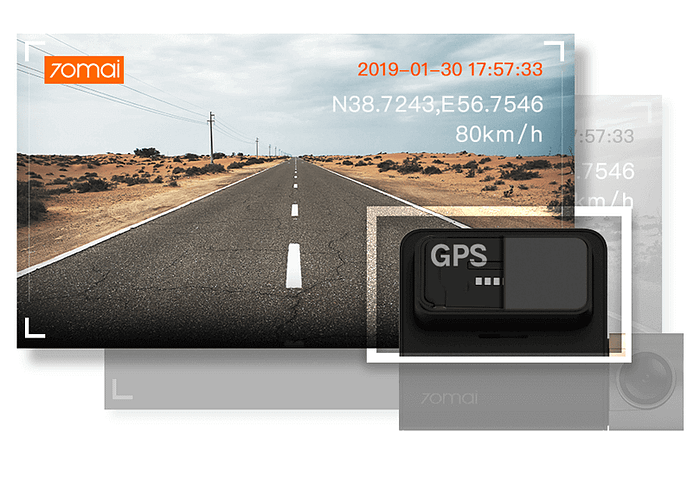
The supplied long USB cable can be routed through the vehicle trim and connected to a compatible vehicle USB connection or cigarette-lighter power adapter. This connection also charges the camera's internal 500 mAh Li-Ion battery.
An optional GPS mount adds GPS and speed information to recorded video. In the reviewed setup, speed information appeared in kilometers per hour and a miles-per-hour setting was not identified, so available unit options may depend on the accessory or configuration.
Loop Recording and Parking Surveillance
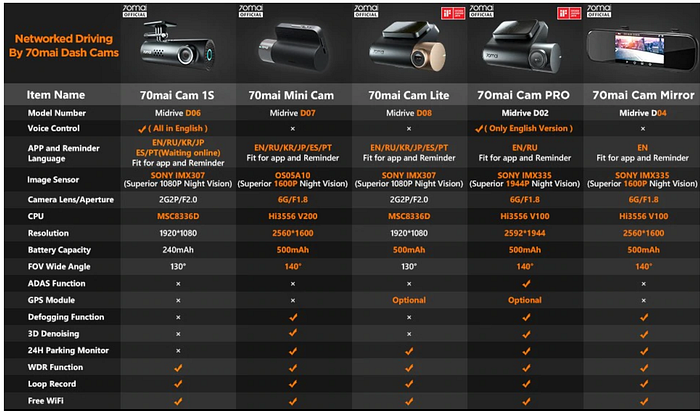
For normal driving, recording can be divided into 1-, 2-, or 3-minute clips. With loop recording enabled, older recordings are removed as storage fills so newer driving footage can continue to be saved.
[compare] Loop Recording | Records normal driving in selectable 1-, 2-, or 3-minute clips and replaces the oldest recordings as storage fills. Parking Surveillance | Uses the G-sensor to trigger event recording while parked when the sensor is activated. GPS Mount | Adds GPS and speed information to recorded video when the optional GPS accessory is installed. [/compare]The parking surveillance mode includes adjustable G-sensor sensitivity. When a parking event has been detected, the reviewed unit provides an audible alert after returning to the vehicle.
[warning] Important recordings can eventually be replaced during loop recording. Save any footage you want to keep before continued recording overwrites older files. [/warning]Daily Use Routine
- Check that the camera is securely mounted and has an unobstructed forward view.
- Confirm that vehicle power is connected.
- Make sure a compatible microSD card is installed and ready for recording.
- Look for the recording status before beginning a trip.
- Use WDR when additional detail across bright and dark areas is helpful.
- Select a 1-, 2-, or 3-minute loop length according to your preferred clip organization.
- Adjust G-sensor sensitivity if using parking surveillance.
- Review and save important footage before normal loop recording replaces older clips.