
A hardwire installation routes the 70Mai Dash Cam power cable behind the vehicle trim instead of leaving a cable connected to a cabin power socket. Depending on the dash cam model and compatible hardwire kit, this setup can provide automatic power with the vehicle and may support parking surveillance.
Fuse box location, fuse type, trim layout, airbag placement, grounding points, and wiring requirements vary by vehicle. Treat the steps below as an installation checklist rather than a vehicle-specific wiring procedure.

Before You Start
[warning] Hardwiring connects equipment to the vehicle electrical system. Incorrect fuse selection, cable routing, or grounding can damage equipment, drain the battery, or interfere with vehicle safety systems. Use a qualified installer if you are not experienced with automotive electrical work. [/warning] [checklist] * Confirm the 70Mai Dash Cam and hardwire kit are compatible * Identify the vehicle fuse box and fuse type before starting * Check where curtain airbags and other safety equipment are located * Choose a cable route that stays clear of pedals, steering parts, seat-belt hardware, and moving components * Make sure the vehicle is safely parked and fully powered down before making electrical connections [/checklist]Do not remove trim or work around a fuse box based only on another vehicle's installation. Vehicle-specific layouts can differ substantially.
Tools and Materials
- 70Mai Dash Cam
- Compatible 70Mai hardwire kit or suitable USB dash cam hardwire kit
- Add-a-fuse or fuse tap adapter that matches the vehicle fuse type
- Appropriate fuse for the added dash cam circuit
- Circuit tester or multimeter
- Fuse puller or needle-nose pliers
- Plastic trim removal tool
- Zip ties or cable ties
- Microfiber cloth for the windshield
- Optional electrical tape or automotive fabric wiring tape
Power Connections

Installation Flow

1. Choose the Dash Cam Position
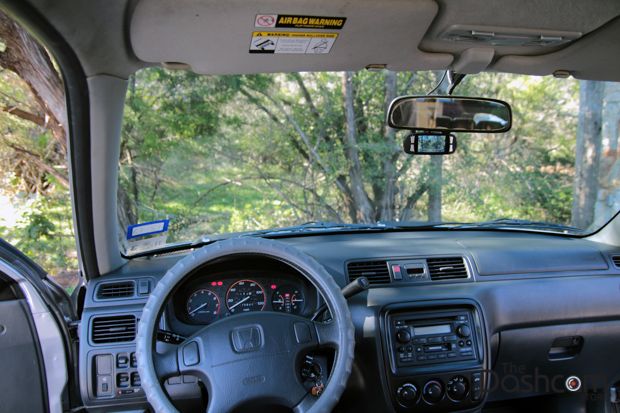
Check the view from the driver's seat before attaching the mount. A position behind or close to the rear-view mirror can keep the camera near the center of the windshield while reducing obstruction.
- Keep the lens view clear.
- Avoid locations blocked by mirror housings, sensors, tint areas, or other equipment.
- Do not obstruct the driver's view of traffic, pedestrians, signs, or signals.
- Make sure the dash cam does not interfere with rear-view mirror movement or factory safety sensors.
Clean the mounting area with a microfiber cloth. If the 70Mai Dash Cam uses an electrostatic sticker or adhesive mount, install it carefully on the prepared surface.

2. Locate the Interior Fuse Box
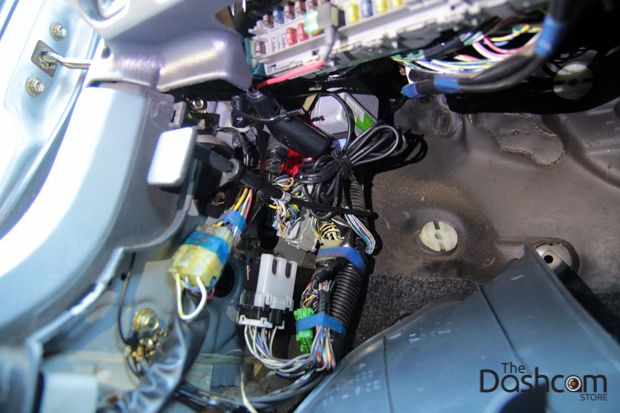
Identify the vehicle's interior fuse box and its circuit layout before routing or connecting wires. Depending on the vehicle, the fuse box may be under the dashboard, behind a side panel, or near the glove box.
An interior fuse box is often convenient for a dash cam because it is closer to the windshield than an engine-compartment fuse box.
[warning] Do not use circuits associated with airbags, ABS, stability control, engine management, or other safety-critical vehicle systems. If suitable non-critical circuits cannot be identified confidently, use a professional installer. [/warning]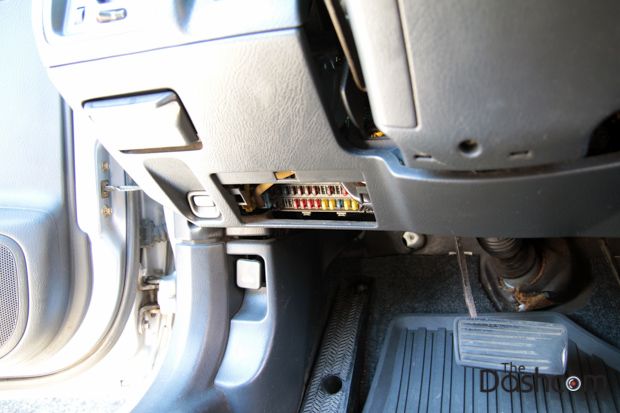
3. Plan the Cable Route
Loosely position the power cable before tucking it behind trim. A typical route runs from the dash cam into the upper headliner, across the top of the windshield, down the side of the cabin, and toward the interior fuse box.
Leave enough slack near the camera to avoid stressing its connector and enough near the fuse area for a clean connection. Do not stretch the cable tightly.

Where suitable, gently tuck the cable along the headliner edge. Use a plastic trim tool carefully so the trim and fabric are not damaged.
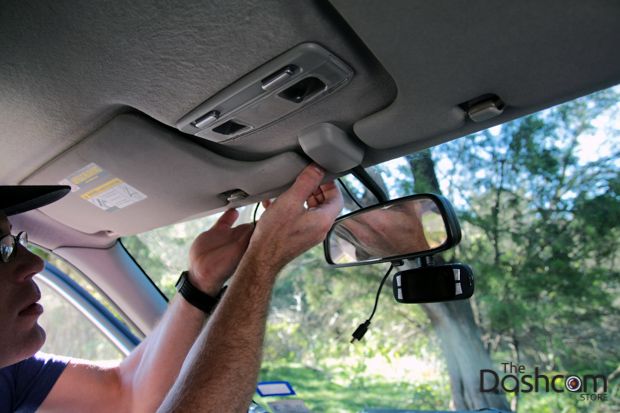
4. Route Around the A-Pillar Safely
The A-pillar beside the windshield may contain a curtain airbag. The dash cam cable must not cross, wrap around, restrict, or sit in the deployment path of an airbag.
Where the vehicle design permits, the cable may be routed along an existing safe wiring path or behind the edge of weather stripping without fully removing the pillar trim.
If the airbag location or correct routing path is uncertain, do not remove the A-pillar trim or place wiring behind it without vehicle-specific guidance or qualified assistance.
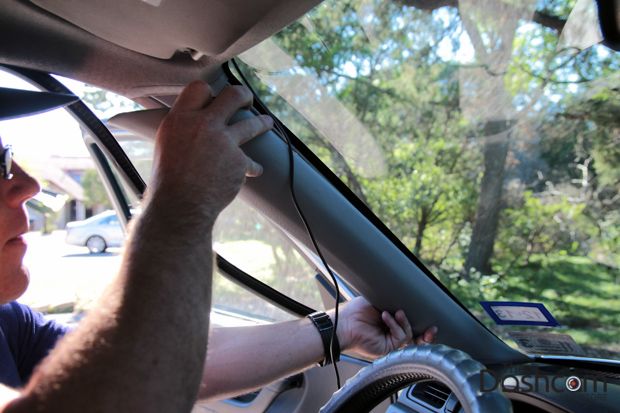
Continue the cable downward without sharp bends or pinch points. Keep it away from exposed metal edges and moving parts.
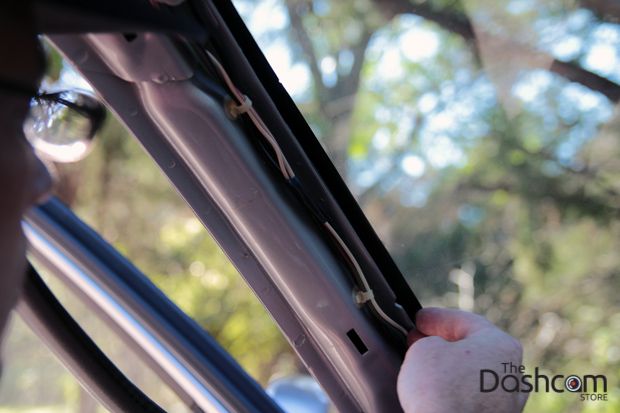
Route the cable toward the fuse box and secure it so no loose wiring can reach the pedals or steering components.
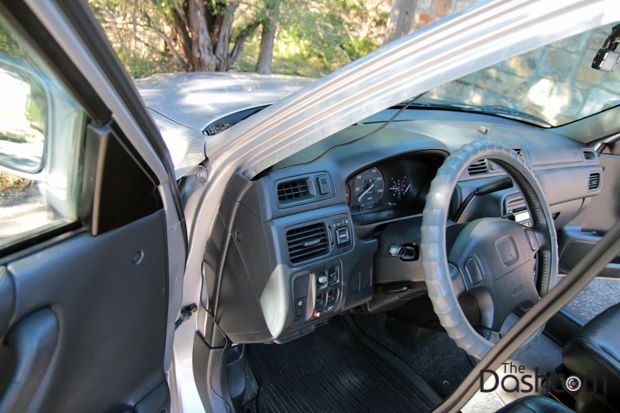
5. Identify Switched Power
For a kit that uses an ACC connection, identify a suitable non-critical circuit that has power with the vehicle in the required accessory or running state and is not powered in the vehicle-off state.
A circuit tester or multimeter can be used by someone familiar with automotive electrical testing to confirm circuit behavior. Do not rely only on a fuse label, because circuit behavior varies by vehicle.
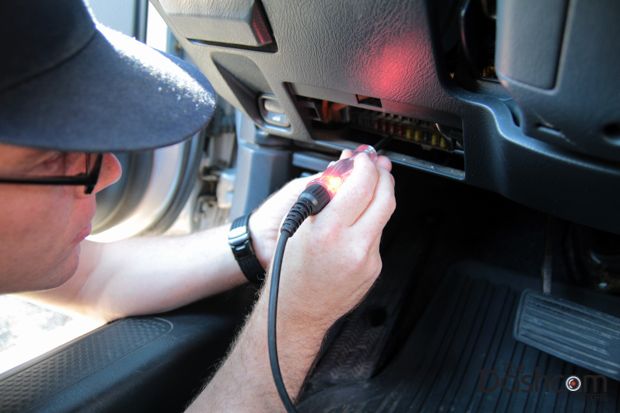
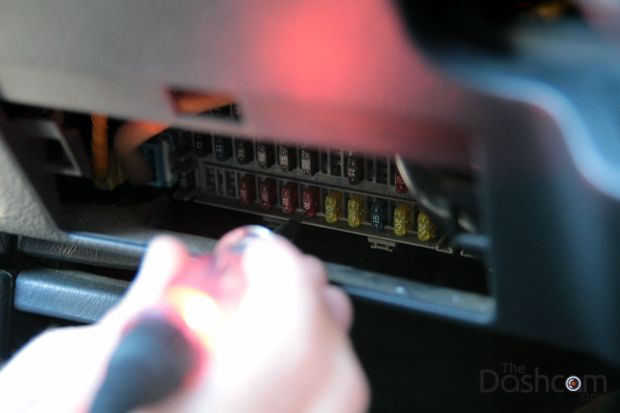
If the compatible 70Mai hardwire kit has a separate constant-power input for parking surveillance, a suitable non-critical constant-power circuit must also be identified. Constant power remains available when the vehicle is off.
6. Power Down Before Removing a Fuse
After the required circuit has been identified, fully power down the vehicle before making a connection. Remove the selected fuse only with the appropriate fuse-removal tool and avoid forcing it.
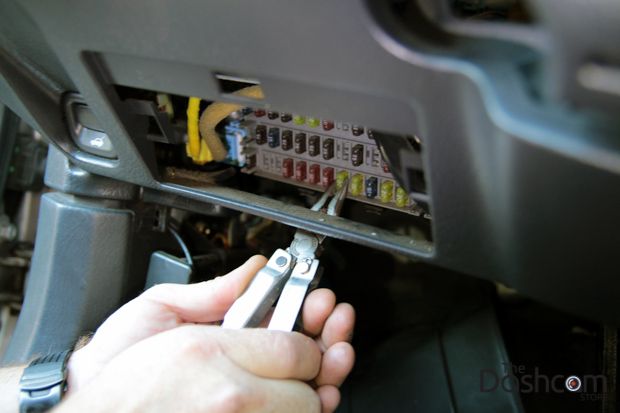
7. Fit the Add-a-Fuse Adapter
The add-a-fuse adapter must match the vehicle's fuse format. Common vehicle fuse formats differ, so confirm the physical type before installation.
The original vehicle circuit and the added dash cam circuit must each remain correctly fuse-protected. Use the fuse arrangement and rating specified for the hardwire kit and vehicle application.
[warning] Fuse taps are directional in many installations. Incorrect orientation or fuse selection can result in improper circuit protection. If the supply side of the fuse position cannot be identified confidently, have the connection made by a qualified automotive installer. [/warning]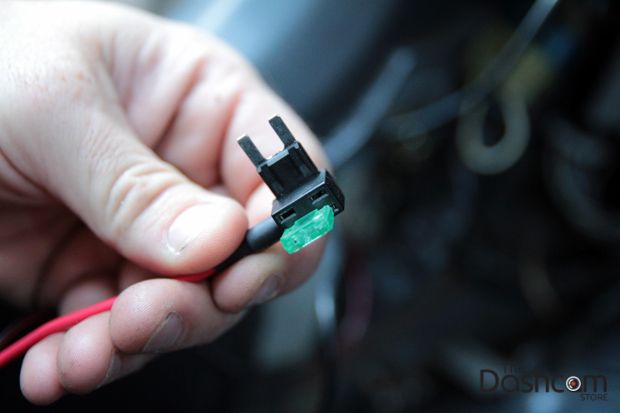
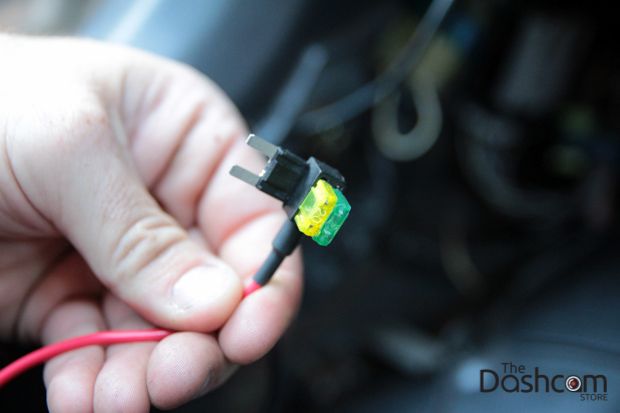
The adapter should fit securely in the selected position. Do not force an adapter that does not match the vehicle fuse size or socket.
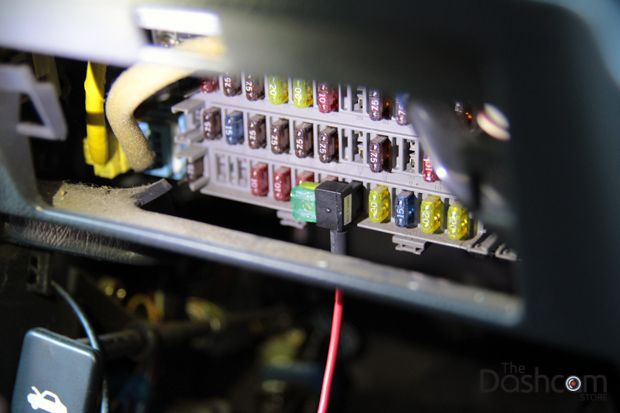
8. Add Constant Power Only When Required
If the compatible hardwire kit has a BATT or constant-power input for parking surveillance, connect it only to a suitable constant-power circuit using the appropriate protected connection method.
Some hardwire kits include low-voltage battery protection. The available cutoff behavior or settings can vary by kit. A more conservative cutoff generally prioritizes vehicle-battery protection over extended parking recording.
For a vehicle that may remain parked for long periods, consider whether powering parking surveillance from the starter battery is appropriate. A dedicated dash cam battery solution may be preferable for some installations.
9. Use a Suitable Ground Point
The ground lead requires a secure chassis ground. A suitable existing vehicle grounding point is preferable to painted surfaces, plastic brackets, loose trim screws, or uncertain fasteners.
A poor ground can cause unstable power, unexpected restarts, or failure to start. If the correct chassis grounding location is uncertain, have it identified by a qualified installer.
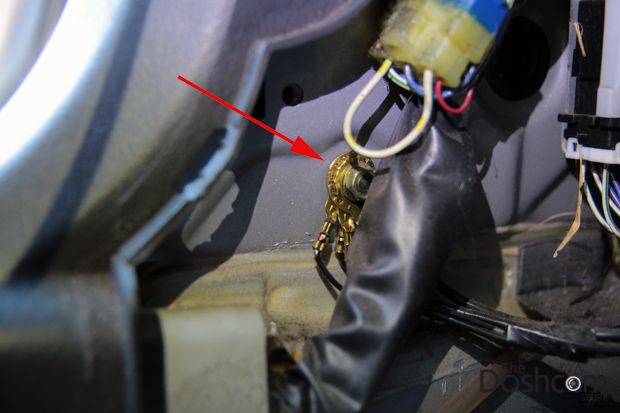
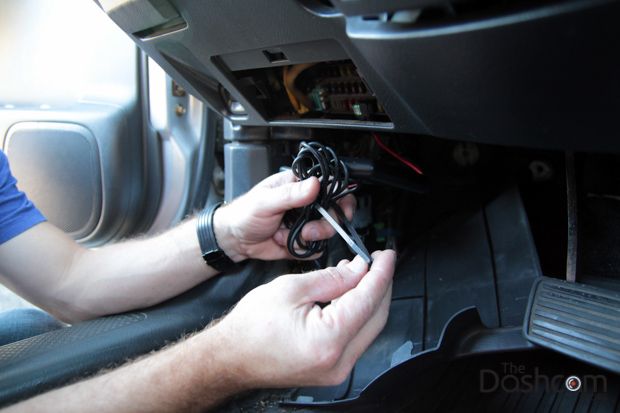
10. Secure the Wiring
Bundle excess cable neatly and secure it where appropriate. Keep wiring away from:
- Pedals and pedal linkages
- Steering shafts and steering components
- Brake-related components
- HVAC doors or moving mechanisms
- Sharp metal brackets or edges
- Trim clips and panel mounting points
Before replacing trim, confirm that the cable will not be pinched or displaced when the panel is installed.
11. Connect the 70Mai Dash Cam
Connect the hardwire kit to the dash cam using the connector required by the specific 70Mai model. The connector may vary between models.
Make sure the plug is fully seated and is not pulled sideways or held under tension. An unstable connection can interrupt recording or restart the camera.
If the 70Mai setup includes a rear camera, route its cable separately toward the rear windshield while keeping it clear of curtain airbags, seat-belt mechanisms, and other moving components.
12. Check Power Behavior
Test operation before reinstalling all removed trim.
[checklist] * Dash cam powers on when the intended vehicle power state is active * Recording starts as expected * Dash cam responds correctly when the vehicle is switched off * Parking surveillance activates only if the model, hardwire kit, and settings support it * No cable or connector becomes loose during the power-state change [/checklist]If the dash cam does not respond as expected, stop and recheck the basic connection points rather than repeatedly changing vehicle circuits.
13. Review Dash Cam Settings
After the hardware installation is operating normally, connect to the 70Mai Dash Cam through its app and review the settings relevant to the installed model.
- Check date and time.
- Prepare or format the microSD card through the dash cam when required.
- Review video resolution and frame-rate settings.
- Enable or adjust parking surveillance only if supported by the model and hardwire setup.
- Review G-sensor sensitivity.
- Check voice-prompt and volume preferences.
- Confirm loop recording is enabled when appropriate.
Installation Checks to Avoid

Basic Operating Checks
[troubleshoot] Problem: Dash cam does not power on Cause: The power connection, fuse protection, ground, or camera connector may not be providing a stable supply Fix: With the vehicle safely powered down where required, check that the adapter and connector are seated correctly and have a qualified installer verify the power and ground if needed Problem: Dash cam remains powered when the vehicle is off Cause: The ACC input may be connected to a circuit that remains powered Fix: Confirm that the intended ACC circuit actually changes state with the vehicle and use a qualified installer if the circuit behavior is uncertain Problem: Parking surveillance does not activate Cause: The dash cam model, hardwire kit, constant-power connection, ACC connection, or app setting may not support the expected parking behavior Fix: Confirm compatibility and that parking surveillance is enabled where supported Problem: Dash cam restarts while driving Cause: A loose camera connector, unstable power connection, poor ground, or storage-card condition may interrupt normal operation Fix: Check accessible connectors and wiring for a secure fit, then prepare or replace the microSD card if storage behavior appears abnormal; have the hardwire connection inspected if restarts continue [/troubleshoot]Final Installation Check
[checklist] * All removed trim is correctly reinstalled * No wire is pinched by trim or weather stripping * Wiring is clear of airbags, pedals, steering parts, and moving mechanisms * Dash cam mount is secure * Camera angle keeps the road centered in the preview * Dash cam starts and records normally * Vehicle-off behavior matches the installed hardwire setup * Parking surveillance is configured only when supported * Date, time, recording, audio, and storage settings have been reviewed [/checklist]Take a short drive after installation and review a recording. Check that the image is clear, windshield reflections are acceptable, the selected audio setting is appropriate, and recording continues without unexpected interruption.
If fuse selection, grounding, airbag-safe routing, or vehicle-specific wiring remains uncertain, use a qualified automotive electrical or dash cam installer rather than experimenting with vehicle circuits.